
Why Roof Fascia Board Replacement Matters More Than You Think
Roof fascia board replacement is one of those home repairs that sneaks up on you. One day your gutters look slightly off. The next, a home inspector is flagging rot and you’re staring at an unexpected repair bill.
Here’s a quick overview of what you need to know:
| Topic | Key Facts |
|---|---|
| Average cost | $1,050 – $3,300 total; $7 – $22 per linear foot |
| Best materials | PVC or aluminum (longest lasting, lowest maintenance) |
| Lifespan | Wood: 5–15 yrs; Vinyl: 10–20 yrs; Aluminum: 20+ yrs |
| Project timeline | 1–2 days for most homes |
| DIY or pro? | Single-story: possible DIY; Two-story or rot damage: hire a pro |
| Top warning signs | Sagging gutters, peeling paint, soft or spongy wood, pest activity |
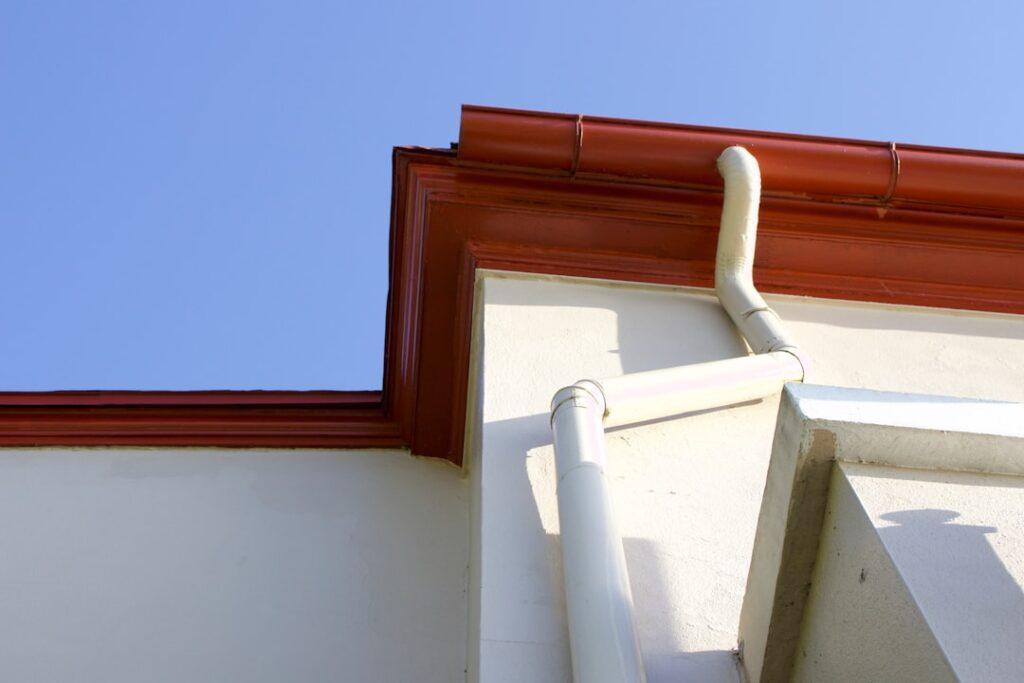
Fascia boards are the horizontal trim boards that run along the edge of your roof. They cap the exposed rafter ends, support your gutters, and seal out rain, pests, and cold air. When they fail, water can reach your rafters and roof decking — turning a simple board replacement into a much bigger structural repair.
Most homeowners don’t think about fascia until something goes wrong. But catching damage early can save thousands in cascading repairs to soffits, rafters, and even your foundation.
I’m Norbert, a general contractor with 25 years of construction and remodeling experience in the Chicagoland area, and roof fascia board replacement is one of the most common exterior repairs I see on homes across Des Plaines, Park Ridge, and beyond. Let’s walk through everything you need to know to handle it the right way.
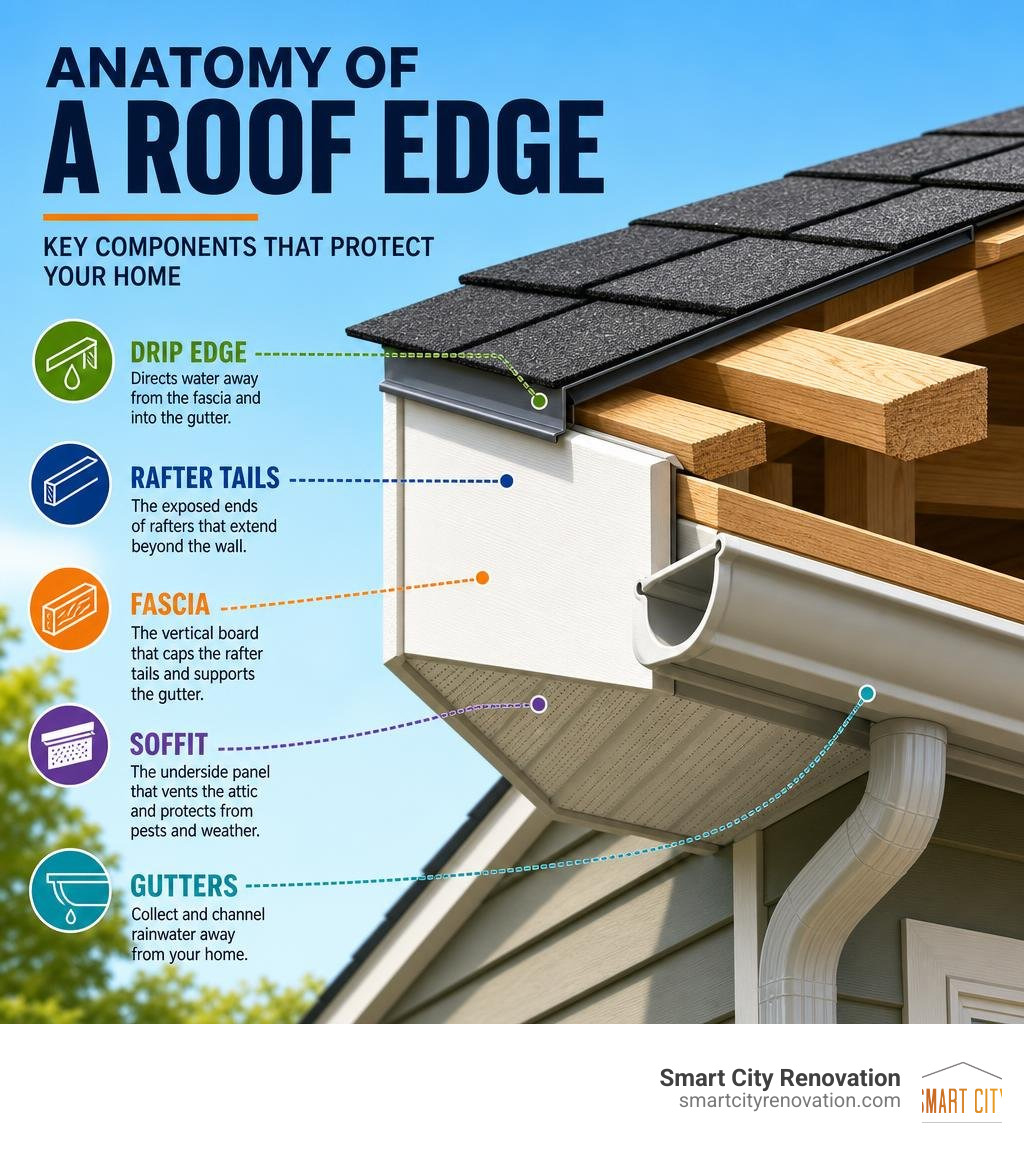
Common roof fascia board replacement vocab:
Understanding Roof Fascia Board Replacement: Costs and Materials
When you realize your home’s roofline is looking a little worse for wear, the first questions are almost always: How much is this going to run me, and how long will it take?
On average, a full roof fascia board replacement costs about $2,500, with typical project ranges falling between $1,050 and $3,300. The ultimate price tag depends heavily on the size of your home, the height of your roofline, and the materials you choose.
Most average-sized homes feature between 100 and 200 linear feet of roof edges. When priced out per foot, you can expect to pay between $7 and $22 per linear foot for professional installation, which averages out to roughly $14.60 per linear foot including both materials and labor. If you have a multi-story home or difficult-to-access eaves, that price can climb up to $40 per foot due to the extra safety equipment and time required.
Labor is a significant portion of this investment. Professional roofing labor typically adds $6 to $20 per linear foot to the base cost of materials, with hourly rates for skilled roofers ranging from $75 to $120. The good news? The project timeline is remarkably quick. A professional crew can usually complete a full soffit and fascia replacement in just 1 to 2 days.
To make your dollar go further, we always recommend combining this project with other exterior upgrades. If you are already planning a gutter replacement or looking into Understanding soffit and fascia repair, doing them simultaneously will save you hundreds in redundant labor fees. Additionally, checking out The Ultimate Guide to Roof Repair can help you identify if other areas of your roof need attention while the scaffolding is already set up.
If you are looking for localized services, reaching out to a professional local contractor is the best way to get an accurate, site-specific estimate.
Here is how the most common fascia materials stack up against one another:
| Material | Cost per Linear Foot (Material Only) | Average Lifespan | Maintenance Level | Best For |
|---|---|---|---|---|
| Wood (Pine/Fir) | $1 – $3 | 5 – 15 Years | High (Requires painting/staining every 3-5 years) | Budget-conscious projects |
| Cedar / Redwood | $3 – $7 | 15 – 25 Years | Moderate (Naturally rot and insect-resistant) | High-end aesthetic appeal |
| Vinyl | $5 – $9 | 10 – 20 Years | Low (Can become brittle in extreme cold) | Quick, color-matched clean looks |
| Aluminum (Wrap) | $8 – $20 | 20+ Years | Low (Protects underlying wood) | Long-term durability |
| Cellular PVC | $15 – $25 | 30 – 50 Years | Zero (Completely impervious to moisture) | Ultimate peace of mind |
Signs You Need a Roof Fascia Board Replacement
Because fascia boards sit directly behind your gutters, damage often starts small and goes unnoticed until it has spread. Proactive inspections are key to avoiding costly structural repairs. Here are the primary red flags that your fascia boards are failing:
- Wood Rot: If the wood looks dark, crumbly, or misshapen, rot has set in. You can perform a simple “screwdriver test” by gently poking the wood with a flathead screwdriver. If the metal easily sinks into the board or the wood feels soft and spongy, the core integrity is compromised and it is time for a replacement.
- Peeling, Cracking, or Bubbling Paint: Paint isn’t just cosmetic; it is your wood fascia’s primary line of defense. Peeling paint allows water to penetrate the wood, accelerating decay.
- Sagging or Pulling Gutters: Your gutters are mounted directly to the fascia boards. If the wood begins to rot and soften, the gutter brackets will lose their grip, causing the gutters to sag, pull away, or overflow.
- Pest Infestation: Holes, chew marks, or sawdust around your roofline are clear indicators of animal activity. Squirrels, birds, and carpenter bees love to exploit weakened wood to build nests in your attic.
If you notice these issues, it is crucial to address them before they cause a serious leak in roof repair situation. You can read more about managing these warning signs in How to identify when to replace or repair fascia and find comprehensive solutions in The Homeowner’s Guide to Fixing That Pesky Roof Leak. For a deeper dive into the technical indicators of damage, consult When and How To Replace or Repair Damaged Roof Fascia Board .
Choosing the Best Materials for Your Roof Fascia Board Replacement
Selecting the right material for your roof fascia board replacement is a balance of upfront cost, local climate challenges, and how much weekend maintenance you are willing to perform.
In our local Chicagoland climate, wood fascia faces a constant battle against heavy snow, ice dams, freezing temperatures, and humid summers. While traditional wood (like pine or spruce) is the most budget-friendly option, it requires regular scraping, priming, and painting to prevent rot.
If you love the natural look of wood but want better durability, cedar and redwood are excellent premium upgrades. They contain natural oils that resist moisture, decay, and insect damage, though they still require periodic sealing.
For a modern, low-maintenance approach, cellular PVC and aluminum wraps are highly recommended. PVC fascia is completely impervious to water and pests, meaning it will never rot, split, or warp. Aluminum wrap, on the other hand, is a thin metal skin installed directly over a solid wood backing, shielding the wood from the elements for decades. Fiber cement is another incredibly tough option that boasts a lifespan of up to 50 years and offers excellent fire resistance.
To explore these material options further, check out Choosing the right fascia materials and review the practical comparisons provided by industry experts.
Step-by-Step Guide to Replacing Your Fascia Boards

Before climbing up a ladder, you need to decide if this is a project you can safely tackle yourself or if it is time to call in the professionals.
If you have a single-story home with easy ground access, solid carpentry skills, and only need to replace a straightforward, dry section of fascia, a DIY approach is entirely feasible. However, if your home is two stories or taller, if the rot has spread deep into the structural rafter tails, or if you are working with specialized PVC or fiber cement materials, hiring a certified roofing contractor is the safest and most reliable route.
Before starting any exterior work, always check your local building codes and permit requirements. Cities like Des Plaines, Mount Prospect, and Glenview have specific guidelines regarding structural wood repairs and gutter drainage. You can consult with local municipal building departments or professional contractors to ensure your project remains code-compliant.
For a complete overview of the installation process, refer to the Step-by-step fascia installation guide. If you decide the heights and carpentry are best left to the experts, learn Why Professional Roofers Near Me Are Worth the Investment to understand the value of professional craftsmanship.
Step 1: Safety Preparation and Tool Gathering
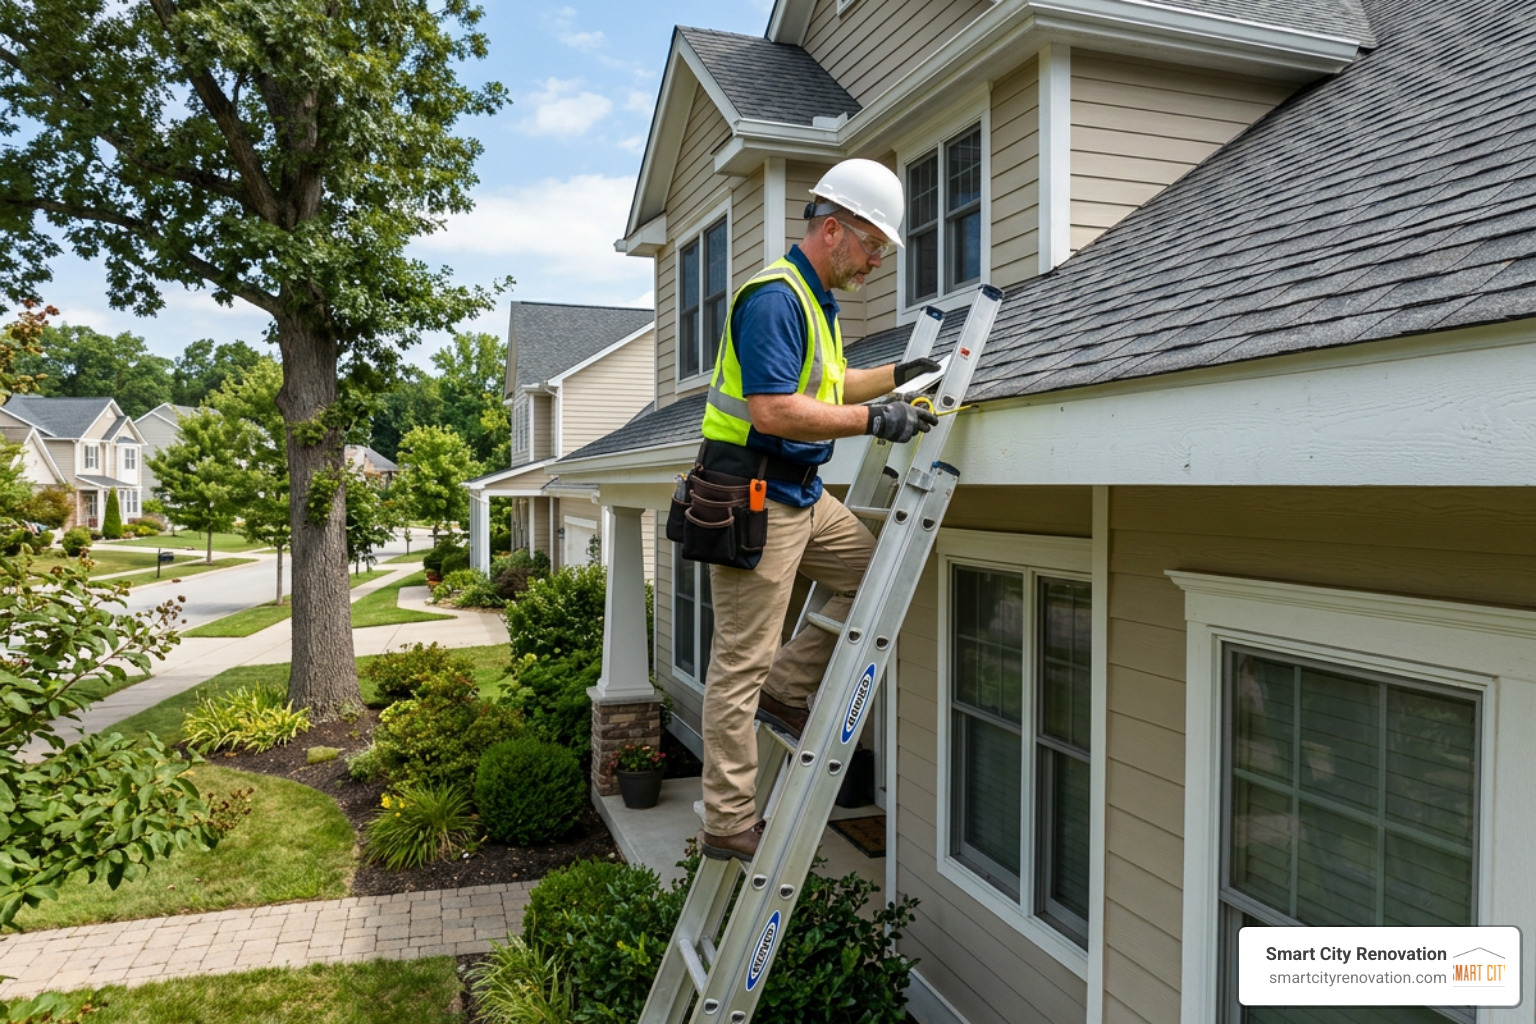
Safety is the absolute number one priority when working at roof height. Ensure you have a stable, ANSI-rated extension ladder set up on flat, solid ground. If you are working higher than six feet off the ground, a fall-arrest safety harness is highly recommended.
Required Personal Protective Equipment (PPE):
- ANSI Z97.1 rated safety glasses
- NIOSH-approved N95 respirator (essential when cutting pressure-treated wood or PVC)
- Heavy-duty work gloves
- OSHA-compliant hearing protection for power tools
Essential Tools and Materials:
- Circular saw or miter saw
- Oscillating multi-tool (perfect for making precise flush cuts)
- Pry bar and hammer
- Power drill with drive bits
- Hot-dip galvanized or stainless steel exterior-grade screws (to prevent rust streaks)
- Titebond 3 waterproof wood glue
- High-quality paintable silicone-latex exterior caulk
- Your replacement fascia boards (plus 10% extra for cuts and waste)
Step 2: Removing the Damaged Fascia
Start by carefully detaching your gutters. Remove the gutter brackets and hangers, using temporary bracing to support long gutter runs so they don’t bend or twist. Once the gutters are safely on the ground, gently pry up the metal drip edge along the roofline to expose the top of the fascia board.
Using a pry bar and hammer, carefully remove the damaged fascia boards. Work in manageable sections, prying the boards away from the rafter tails.
Once the old board is removed, closely inspect the exposed rafter tails. Look for signs of soft wood, deep rot, or mold. The wood’s moisture content should ideally be below 12%. If the rafter tails have a moisture content exceeding 20% or show signs of structural crumbling, they must be repaired or “sistered” with new lumber before you can install the new fascia board.
Step 3: Measuring, Cutting, and Installing the New Board
Measure the distance between your rafter tails carefully. When installing multiple boards along a long roof eave, your joints must always land directly on the center of a rafter tail to ensure a secure fastening point.
For a professional, water-tight finish, cut the ends of your boards at a 45-degree angle to create “scarf joints” rather than simple butt joints. Scarf joints allow the boards to overlap slightly, which prevents seasonal expansion gaps and keeps water from slipping behind the wood.
Installation Steps:
- Pre-drill: Pre-drill pilot holes near the ends of your boards to prevent the wood from splitting when fastened.
- Apply Adhesive: Apply a generous bead of Titebond 3 waterproof glue to any scarf joints.
- Fasten: Position the board flush with the top of the rafter tails and secure it using two 2½-inch galvanized exterior screws or nails at every rafter location.
- Seal: Fill any nail holes, joints, and the top seam where the fascia meets the drip edge with a high-quality exterior caulk.
- Finish: Prime all raw wood edges and apply at least two coats of premium exterior-grade paint to protect the assembly from Chicagoland’s harsh weather.
Frequently Asked Questions About Fascia Board Maintenance
Proactive maintenance is the easiest way to ensure you don’t have to repeat this entire process in a few years. For practical upkeep advice, check out these helpful Gutter and fascia maintenance tips.
Can I replace fascia boards without replacing the roof?
Yes, absolutely! You can replace your fascia boards independently of your roof shingles. The key is to work carefully around your existing drip edge. The metal drip edge sits directly on top of the fascia board to direct water into the gutters. As long as you gently lift the drip edge without bending or tearing it, you can slide the old fascia out and slide the new one in.
However, if your fascia rot was caused by a chronic roof leak or water backing up under your shingles, simply replacing the board won’t solve the root problem. If you live in the northwest suburbs, consulting with specialists in Expert Roof Repair in Des Plaines: Restoring Your Home’s Protection can help ensure your roof is completely watertight.
How long do different fascia board materials last?
The lifespan of your fascia depends heavily on the material you choose and how well it is maintained:
- Standard Wood: 5 to 15 years (highly dependent on regular painting and sealing).
- Vinyl: 10 to 20 years (maintenance-free, but can crack under heavy Chicago snow loads or freeze-thaw cycles).
- Aluminum Wrap: 20+ years (excellent for protecting underlying wood from moisture).
- Cellular PVC & Fiber Cement: 30 to 50+ years (the most durable, rot-proof options on the market).
For local insights on how these materials hold up in our regional climate, reach out to local exterior professionals.
When should I repair versus replace my fascia?
If the damage is highly localized — such as a small, superficial soft spot or a minor crack from a storm — a simple repair is often sufficient. You can cut out the small damaged section over a rafter tail, install a matching Dutch patch, seal it with exterior caulk, and paint over it.
However, if the rot has spread across multiple rafter bays, if the wood is soft to the core, or if the fascia is bowing and can no longer support the weight of your gutters, a complete replacement is necessary to protect your home’s structural integrity.
Conclusion
Your fascia boards may look like simple trim, but they are critical structural components that keep your roofline strong, secure, and beautiful. Whether you decide to tackle a single-story DIY replacement this weekend or want the peace of mind that comes with professional installation, taking care of your fascia protects your home’s curb appeal and overall value.
At Smart City Renovation, we bring 25 years of construction, remodeling, and roofing expertise to homeowners across the Chicagoland area. From Des Plaines and Park Ridge to Arlington Heights and Mount Prospect, we know exactly what it takes to protect your home from local climate challenges.
Ready to make sure your roofline is fully protected? Schedule a professional roofing contractor inspection with our expert team today!